For a quick introduction to the Slides Creator add-on, please follow the steps below to run a mail merge via the add-on:

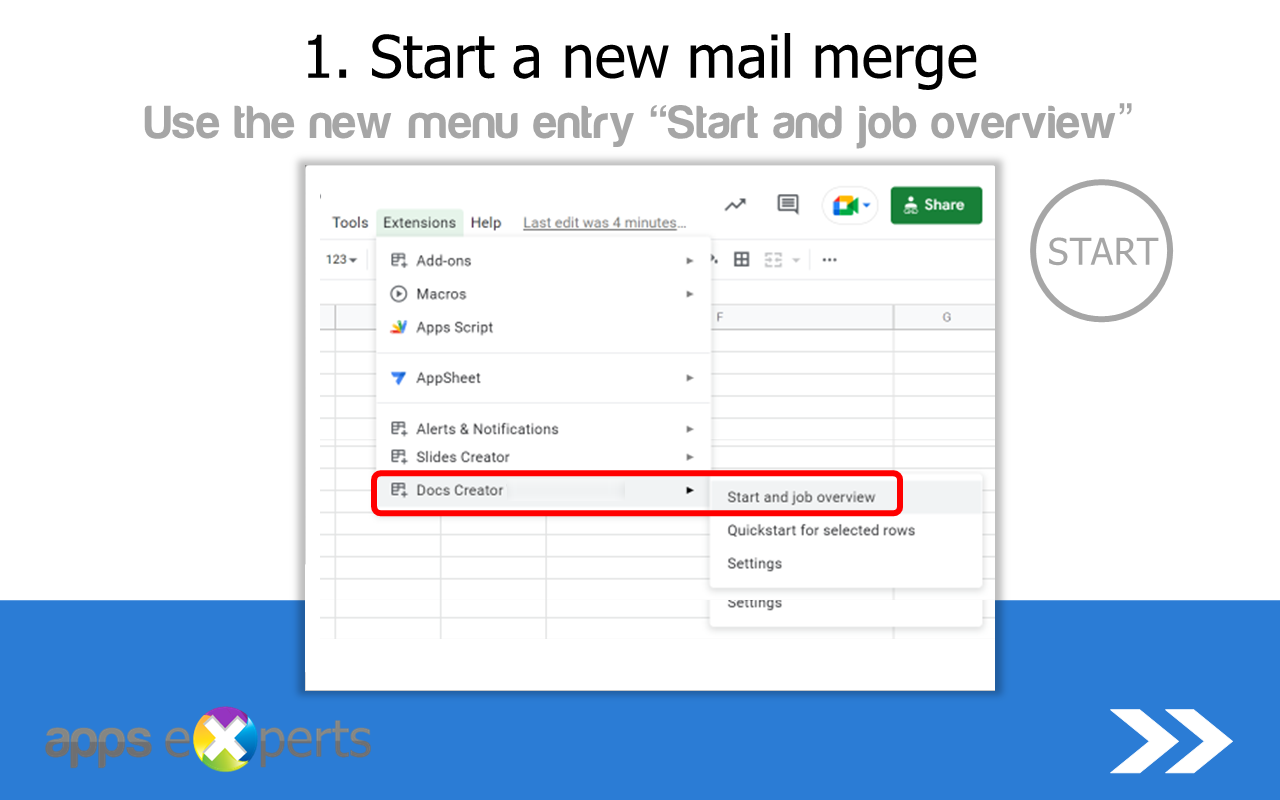
Start the add-on
After installing the add-on from the Google Workspace Marketplace just open a Google Sheet and check for the menu item “Enhancements → Slides Creator → Start and job overview”
Create a job
On the start page “Job Overview” you can see a list of all your created Jobs. Create a new job by clicking on the red button „Create“.
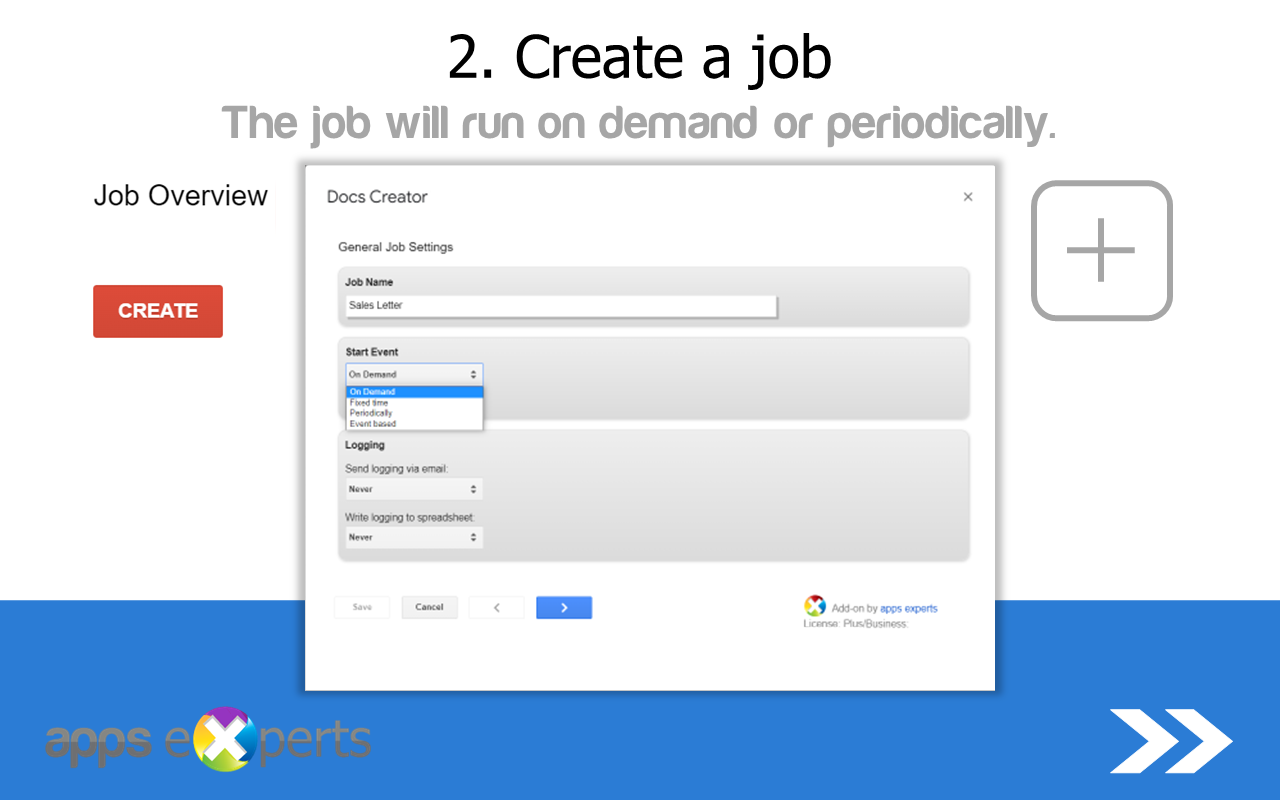
Assign any name to your new job in the „General Job Settings“. Also set a desired start time, standard is „On Demand“. Optionally you can activate a processing log. Then click on the blue “Next”-button ( „>“-symbol).
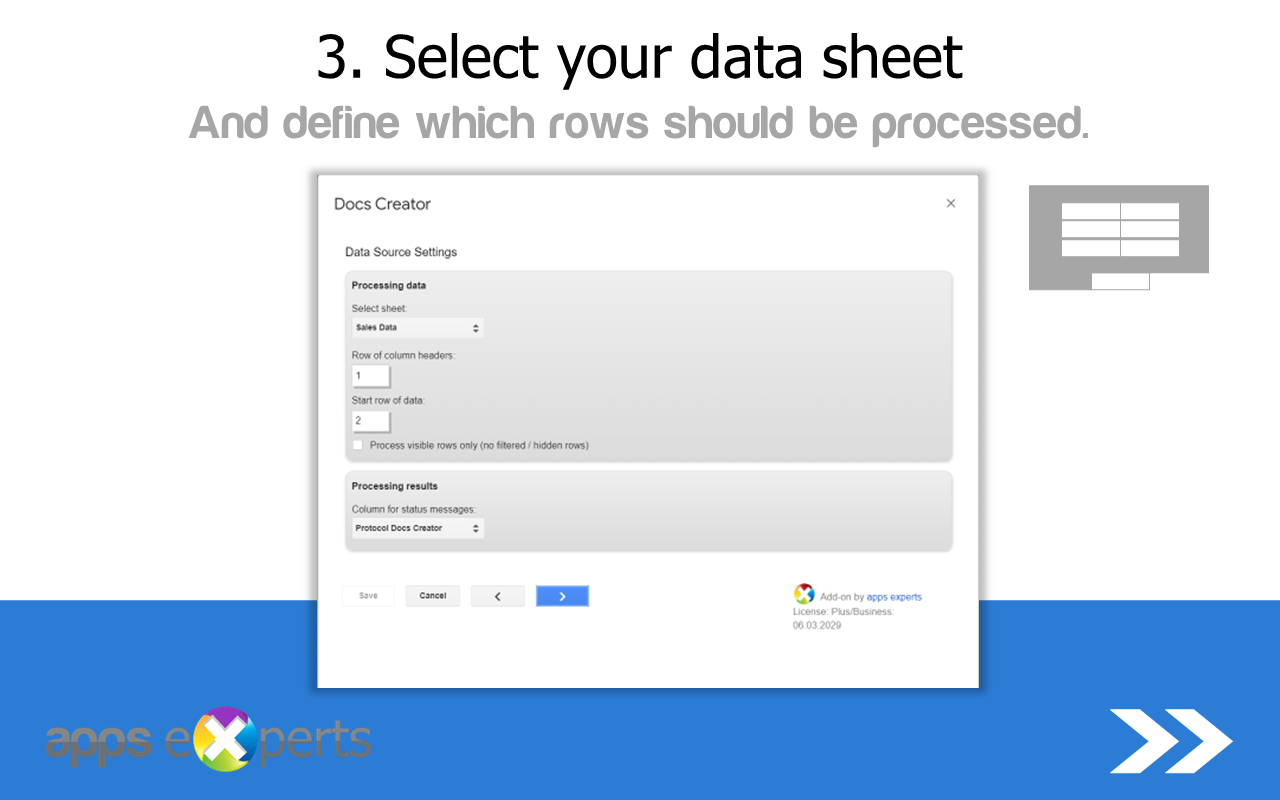
Select your data
On the next step “Data Source Settings” you can configure all settings about the processed data. First of all, select the relevant sheet with the data that should be processed. By default, row number one is pre-selected as the column header row. Row number two is defined as the start row of your data. You can adjust these default values if necessary. All processing results will be written into a column for status messages. By default, a new column “Protocol Slides Creator” will be created by the add-on.
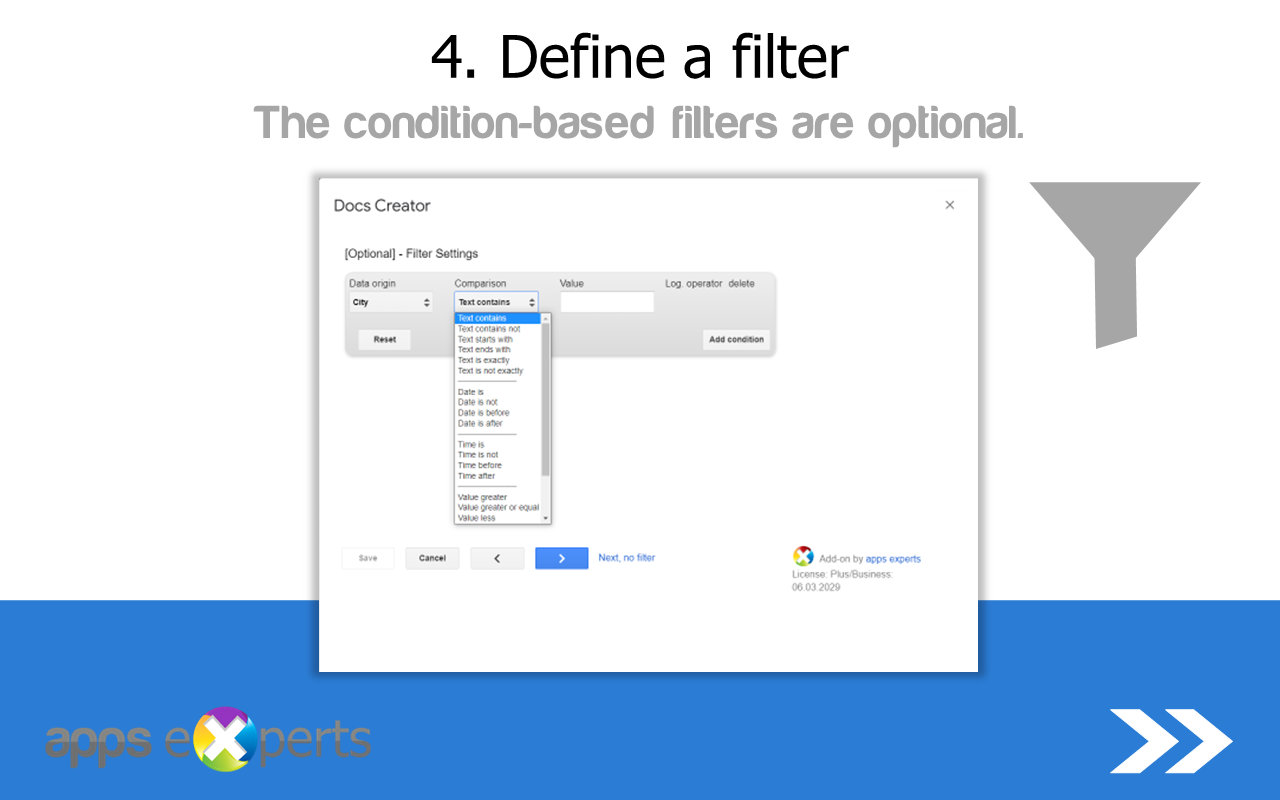
Define a filter [optional]
OPTIONAL – Via the filter settings you can define a condition based rule to filter your data records. Defining a filter is optional. You can skip this step by just moving forward via the “Next, no filter” link.
Select your Docs template
Last step to finalize your job is to configure the “Action Settings” dialog. Most important is that you select a Google Slides presentation template first from your Google Drive. In this presentation template you can use placeholders to refer to the column headers of your selected sheet. To use a column header in your Google Slides template as a placeholder it has to be surrounded by „%“-characters. Examples: %Name%, %Address%, %Email% etc. Please note that a placeholder, apart from the percentage sign at the beginning and at the end, must be identical to the column headers used in the Google Sheet. It is also case-sensitive.
Furthermore, you can also specify the „Merge method“ of presentation creation by the add-on in the „Action Settings“. Depending on your selection, you determine whether the add-on should create separate presentation documents or one slide deck (one collective document) for all processed rows. You can also choose a label merge function which inserts several lines of data into one presentation template.
Additionally you can also specify the desired file format (Google Slides or PDF) of your generated presentation documents.

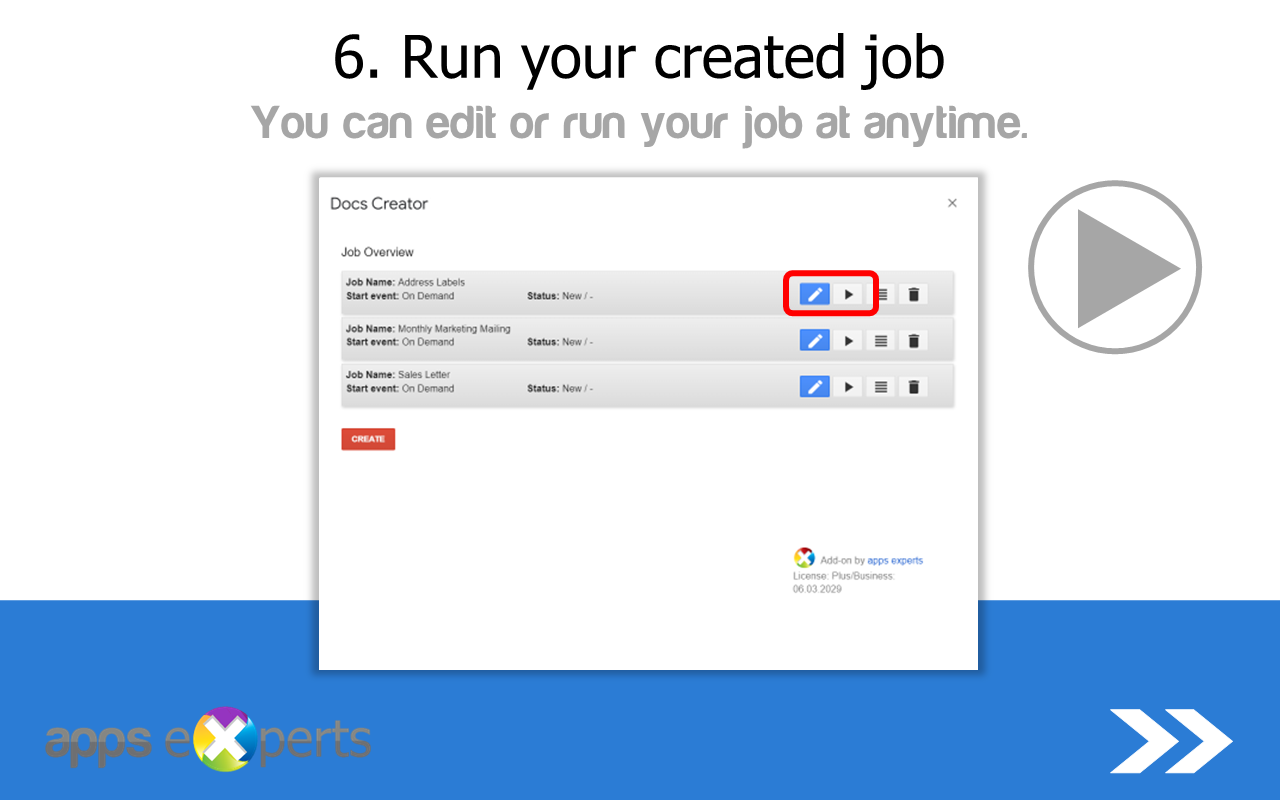
Run your created job
By clicking on the „Save“-button your settings are saved and the job is finally created. The newly created job is now listed in your start page „Job overview“. You can start the job manually at any time using the “Execute” button (⏵- Symbol) and generation of you Google Slides presentaion documents is started irectly and saved on your Google Drive!
You can access the complete user manual with all the details about the Slides Creator Add-on via the following link: Slides Creator User Manual